Cork Mosaic Installation
Installation of the Advance Cork mosaic is similar to
ceramic or mosaic tile installation. It can be installed by using the glue
then grout method. The existing substrate should be clean, including
complete removal of old adhesives, dirt, debris, and any other contaminant
that may negatively impact the bonding of the Cork. It is recommended that
the installation be done by trained professionals.
SUBFLOOR: Can be installed on different surfaces including concrete,
tile backers, or plywood. Concrete must be fully cured and smooth. Surface
may need to be etched for enabling a solid bond between the adhesive and
cork. Plywood needs minimal flex, no less than 1” thick over joists
spaced a maximum of 16” on center
Installation process:
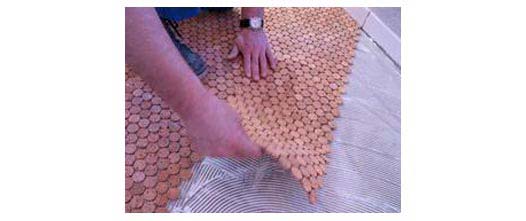
Step-1:
Dry Lay – Lay Advance Cork sheets on subfloor where they will be
affixed. Make your appropriate cuts and get everything prior to applying
adhesive.
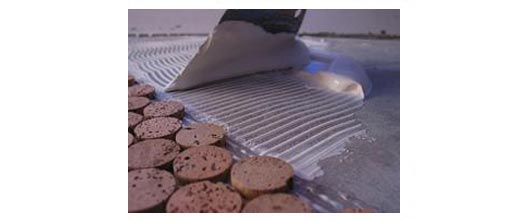
Step-2:
Remove Advance Cork sheets from subfloor and spread evenly a flexible
ceramic thin set mortar (or water-based contact cement, if not in a shower)
on the prepared substrate according to manufacturer’s specified
instructions.
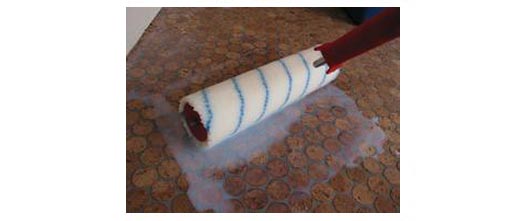
Step-3:
Carefully place Advance Cork sheets on to adhesive while applying even
pressure for ensuring that the sheet is on the same level and also forms a
solid bond with the adhesive. Make sure each cork disc is firmly embedded in
adhesive, paying strict attention to working with the “open time”
of the adhesive used. Allow adhesive to fully dry, as not allowing time for
adhesive to dry can trap moisture beneath cork can create adhesion / rotting
problems.
Step-4:
Remove Plastic film from the top of the discs. Staining – OPTIONAL (if
not staining, skip to step 5): To stain Advance Cork you must first start
with “unfinished” discs, by purchasing unfinished product. Apply a
water-based wood stain s per manufacturers’ specs, followed by at least
2 coats of water-based polyurethane.
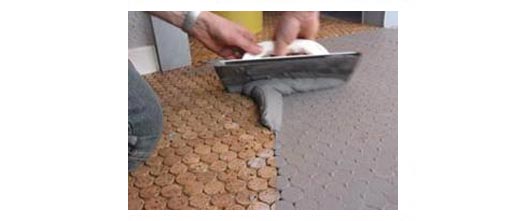
Step-5:
Apply a urethane or silicone enhanced sanded grout with a rubber trowel,
making certain that all joints are filled. Improper application of grout
might affect the installation, so ample care should be taken. If standard
grout is not mixed properly can cause gapping between cork and grout. The
finished joints should be uniformly smooth, without any voids or low spots.
Remove the grout off the top of the cork within 10 minutes to prevent the
grout from drying on top of the cork. A commercial tile sponge, first
abrading the surface with rough side of sponge and cleaning off grout with
smooth side of sponge tends to work well.
Step-6:
Allow the grout to cure completely (curing time could take 3-4 days). If
installing in a residence, the installation is complete at this point. If
you are installing in a Wet Application(residential or commercial) or heavy
Commercial Applications, finish the installation by evenly applying 2 to 3
additional “thin” coats of water-based polyurethane to seal the
floor together (2-3 thin coats is better than 1-2 thick coats). We recommend
a 2-component wood sealer/finish. 2-component finishes are more durable than
single component ones and will last longer in between finishes .
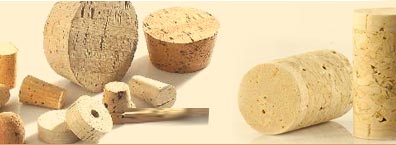
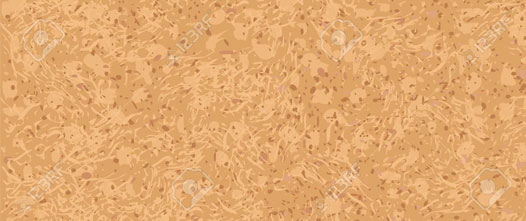
Cork Wall Tiles
Composition Cork is made of cork granules, which have been, joined together using different synthetic or natural binding agent. One of the most widely used agglomerated cork product viz. cork sheets is available in different grades, textures, bondings, densities and even colour. The standard size of cork sheet is 3' x 2' and thickness ranges from 0.8mm to 10mm (and slabs up to 125mm). At Advance Cork International we also supply Cork sheet in roll forms from 0.8mm to 6mm thickness and width of 610mm or 915mm and even 1 metre.
Uses of cork sheet :
- Bulletin Boards
- Wall Coverings
- Table Mats, Trivets & Hot Pads
- Gaskets Die Cut Coasters & Discs
- Any Shape & Thickness